
Not just any ham, but home-cured and smoked ham.
So, in November, 2011 (yes, that was 1.5 years ago, but bear with me…) I popped into my local grocery store to find they had a few pork legs sitting in the meat department, for a really good price. This isn’t a normal occurrence; in fact, it hasn’t happened since. Not one to pass up an opportunity to try something new with the smoker, I picked up a couple of them and threw them into the freezer for future use.
I pulled the first one out for Christmas 2011, and headed off to the internet for some ideas. I found and used this recipe from The Dizzy Pig Barbecue Company as a guide. I brined the leg for about 4 days, smoked it up, and finished it in the oven. It wasn’t bad. In fact, it was pretty good. But there were errors made – not injecting and not brining long enough. After cutting into the ham, what I found was that I had a pork leg that was ham half through, and roast pork the rest of the way to the bone. Unfortunately I didn’t get a photo, because it was pretty cool looking (but obviously not what I was after).
Fast Forward to Christmas 2012. I decided to give it another go, and to get it right.
I poked some more around the nets, and again settled on the folks at The Dizzy Pig for my guide. And this time I took notes and photos, to pass on to you.
Remember: Wisdom is learning from others’ experience!
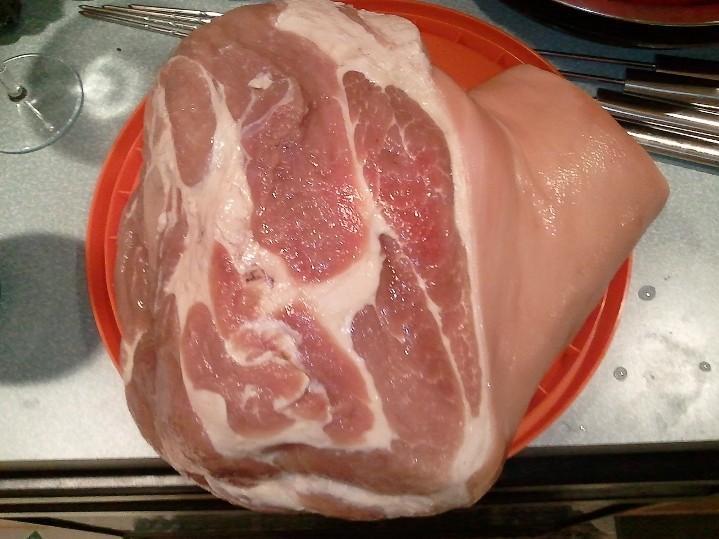
A major divergence I took from the Dizzy Pig folks is that I left on the rind and fat. I love their suggestion of removing and rendering the fat to make your own lard. And, of course, the rind can be turned into chicharones. But I and my family love the skin after it has been brine and baked, so there you go. One of the joys of cooking is to do what makes you and those around you happy.
Note: I used a 10.7 pound ham for this recipe.
Step 1: Defrost the Pork Leg
Well, that’s pretty self-explanatory. I moved it from the freezer to the fridge about a week before brine time.
Step 2: Make the Brine
In a large, non-reactive (stainless steel or glass, not aluminum) pot combine:
1/8 Cup White Pepper
1/4 Cup Whole Cloves
1/2 Cup Granulated Onion1/2 Cup Granulated Garlic
3 Cups Tender Quick
3 Cups Brown Sugar
16 oz Maple Syrup
240 oz (30 Cups) Cold Water
Heat and stir until the ingredients are dissolved.
Cool the brine to 40 degrees F. This is critical – you don’t want to put your cold pork into a hot brine!

Brine Temperature
Step 3: Brine the Ham
One the brine is cooled, inject 1.5 to 2 cups deep in the meat and around the bone. (The Dizzy Pig folks recommend a cup per every 4 to 5 pounds.)
Use the remainder of the brine to cure your ham.
Place the ham in a container that fits in an ice chest or your refrigerator. I’m lucky enough that my barbecue fridge can hold a 5 gallon bucket.

Ham in the Bucket
I also was fortunate enough that the pork leg wedged perfectly in the bottom of the bucket. Once the brine was added, the leg didn’t float. If yours does, make sure to use a large plate with a weight or something similar to weigh it down under the brine.
Non-Required Step: Make Sure You Have a Good Assistant
 To Help")
Montana Trying (Hoping?) To Help
Step 4: Brine the Pork
With an 11 pound ham, I left it in the brine for about 4 1/2 days. Between the injection and the brine time, that was plenty to turn this pork leg into a ham.
It isn’t completely obvious in the next photo, but after the brining, the meat had definitely taken on a pinkish hue.
Brined Ham
Step 5: Rinse the Ham
At this point if you were to cook and eat the ham, you would need to chase it with a lot of water (or beer…) – it would be extremely salty!
Side Note: If you order a cured Tennessee ham, they also need to be soaked – usually for several days – before cooking.
I emptied the brine out of the bucket, replaced the ham, filled it with water, and let it have a nice soak (in the refrigerator!) for about two hours. A quick switch of the water and a second bath, and the ham was ready for the smoker.
Step 6: Smoke the Ham
Since Christmas dinner was at my in-laws’ house, the entire cook wouldn’t happen on the smoker. In this case, the plan was to smoke the ham and then fully cook it in the oven.
The ham was smoked with hickory (you can’t beat a classic!) at about 200°F for three hours. It’s important to remember that much more than that will be too much smoke for most any meat.
Here you can see the difference in color from the smoke – starting to look like the real thing!

Smoked Ham
With the smoking completed, I bundled up the ham in a small ice chest, and headed off for Christmas Eve dinner.
Step 6: Cook the Ham
About some things, I can be a bit of a traditionalist. Prior to cooking, I used a sharp knife to score the skin in the classic diamond pattern. Next time through, I’ll likely do this step before smoking; the smoking process did make the skin a bit tougher than when strictly “raw”.
After scoring, I cooked them ham at 350°F until it reached 160°F inside – about 2.5 hours cooking time. Here she is cooked…and with a few skin tester pieces missing…sometimes temptation can be impossible to resist.
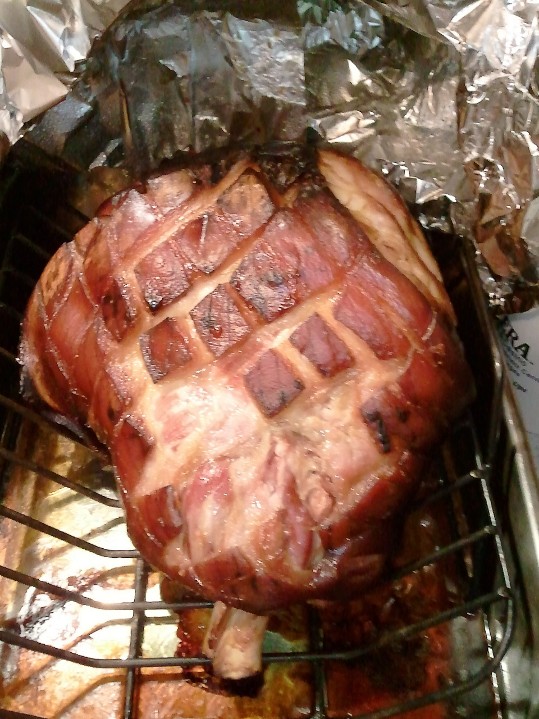
Cooked Ham
Step 7: Carve and Eat and Enjoy!
I’m hoping you can figure this part out for yourself. And don’t forget to save that lovely bone for next week’s soup!
