Hey, don’t be looking at the amount of time between this and the last post – I’ve had things to see, people to do…
Great happenings on the Competition Barbecue front the last two outings.
In Wenatchee at the Eastern Washington BBQ Championship, we won First Place in CASI Chili, Third Place in Sausage, and our FIRST First Place in Brisket! Christene didn’t believe me about the Brisket win – she was sure that we had taken a First previously. She wasn’t convinced until we got home where she was scanning over all the trophies.
This was a nice change after having our worst showing ever at the Sam’s Club Tour event in Renton, Washington.
And now for some obligatory Food Porn:

1st Place Brisket
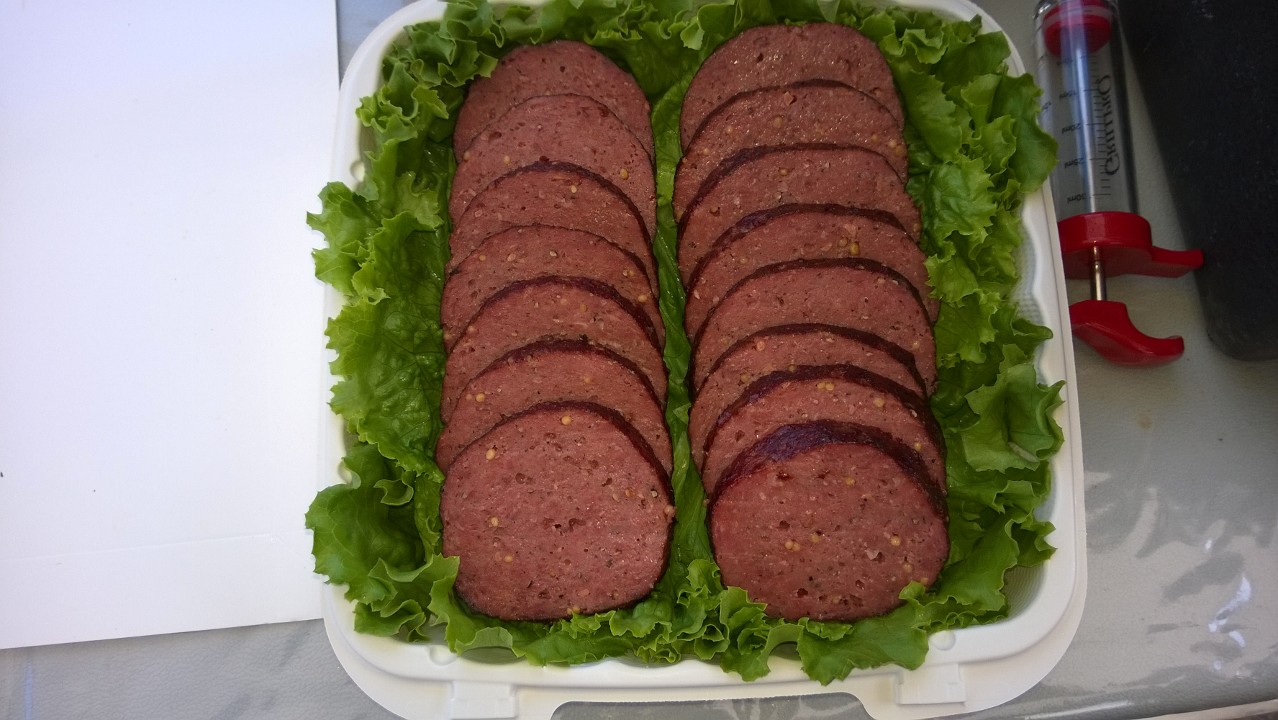
2nd Place Sausage
Riding high after a decent showing in Wenatchee, we next headed up to Langley, British Columbia for the 27th Annual Canadian Festival of Chili and Barbecue. The guys up there – Wayne, Dave, and Fred – always put on a great event, and we were excited to be able to cook it again after several years running the judging side of things.
This is a big, busy event that had nine categories over two days. Saturday’s “Extra” categories were Hamburger, Chef’s Challenge (Chicken Wings), Homestyle Chili, CASI Chili, and Grill Grates Steak. (OK, there were also two Kids-Q categories, but I’m a bit too old for those…) One of the things I love about this event is that Saturday’s category results are announced Saturday, so you don’t spend all evening wondering just how well you did (or did not).
Our results for Saturday were pretty darn good. Christene’s CASI Chili placed Third. This broke her 8 Win Streak, but she was happy to lose her First Place spot to long, long time cook Judy Anderson. Our Chicken Wings placed Ninth, and the Hamburger Sliders took Second. I thought our steak was awesome (rubbed with Truffle Oil and finished with Truffle Salt), but even though it didn’t make the Top 10, I can honestly say that the Grill Grates on which we were required to cook were fraking awesome!
The sliders, of which I’m particularly proud, got perfect scores from 3 of the 6 judges, and great reviews from the folks in our tent. This next bit is what was on them – you may want to skip ahead of you’re not interested.
I started with brioche slider buns from Macrina Bakery, and bacon burger meat (bacon ground into the ground beef) from our favorite meat market Double DD Meats. On the toasted bun we had a Dijon mustard-brown mustard-honey-mayonnaise spread, spicy-sweet pickles, and micro greens, with the smoked burger topped with grilled ham and melted baby Swiss cheese. Skewers to hold them together, a nice slate tray and a sprinkle of greens to make it pretty, and off to the judges.
If you made it through the description, you really deserve the next round of Food Porn!
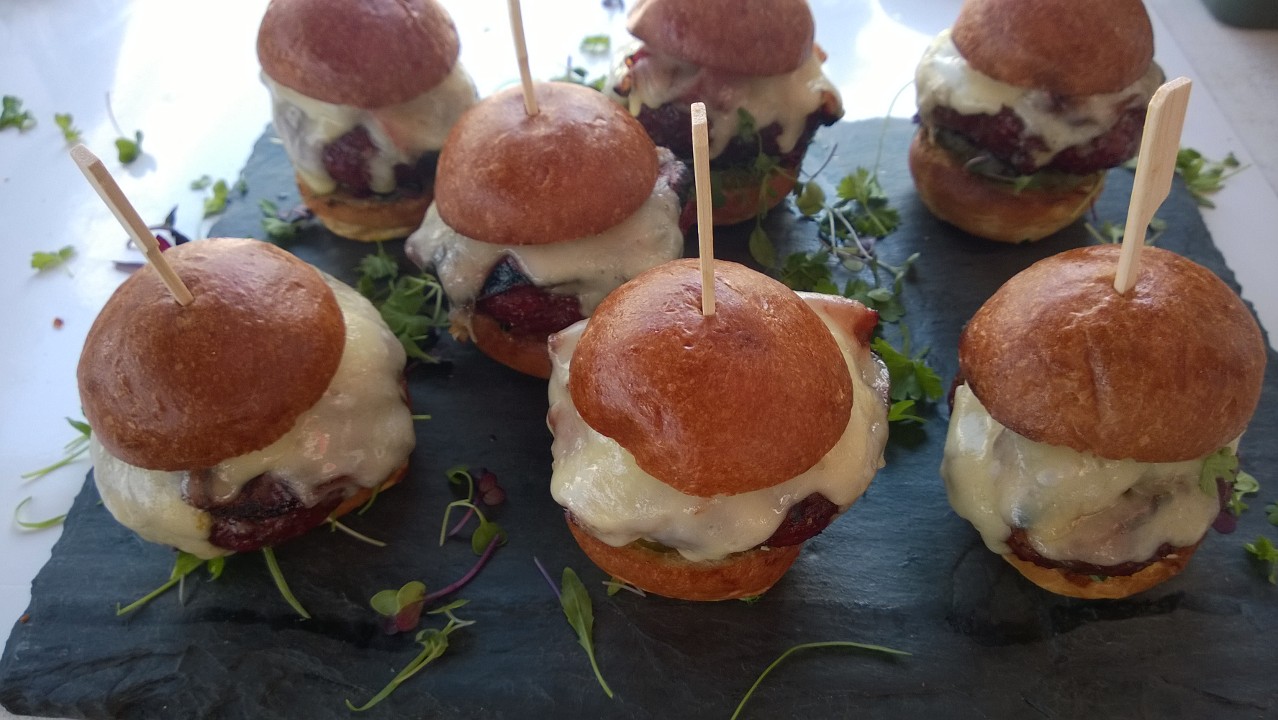
2nd Place Burger
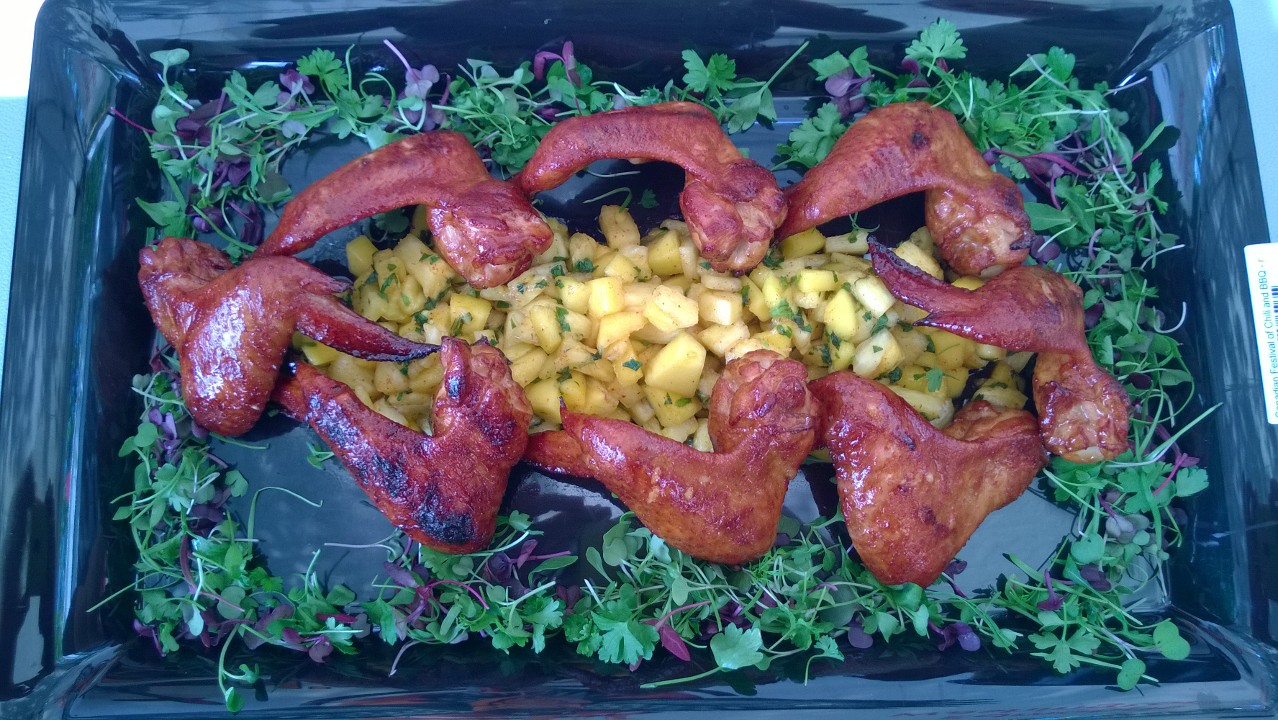
9th Place Wings
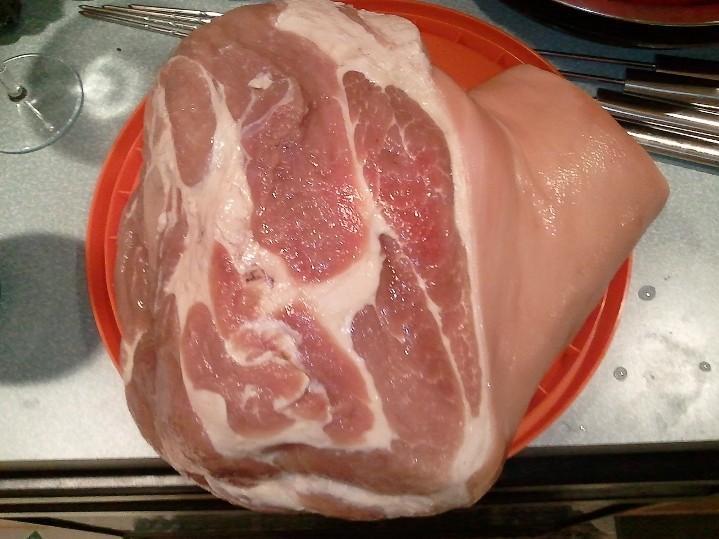
After all that cooking, cleaning everything up, and resetting for Sunday, it was time to inject and season the big meats. Just wish that there had been time for a nap…
Everything on Sunday’s turn-ins went really smoothly. I think we’ve got a good handle on our timing for the big meats and two cookers. Our pork and brisket we were quite happy with, our chicken and ribs…only sorta. Shows what I know!
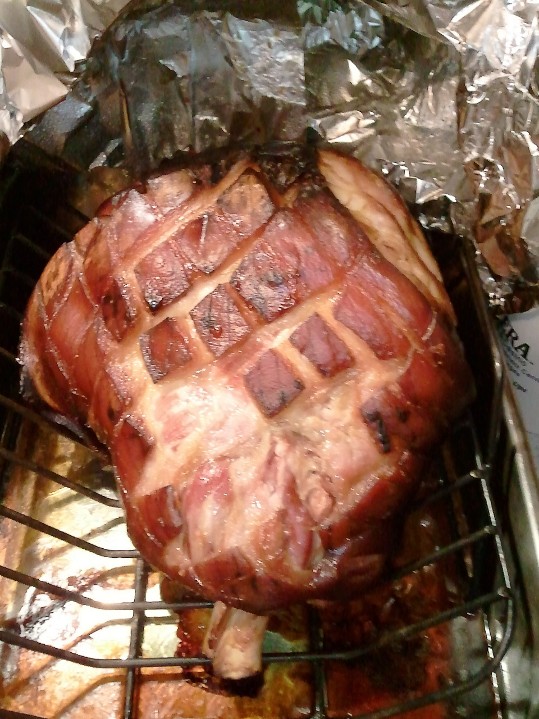
When the results came out, we had a Sixth Place in Pork, Fifth Place in Brisket, Fifth Place in Chicken, and Second Place in Ribs. This is the first event in quite a long time where we were able to place in the Top Six in all four Main Categories. As always, Christene did a phenomenal job of boxing up our turn-ins.
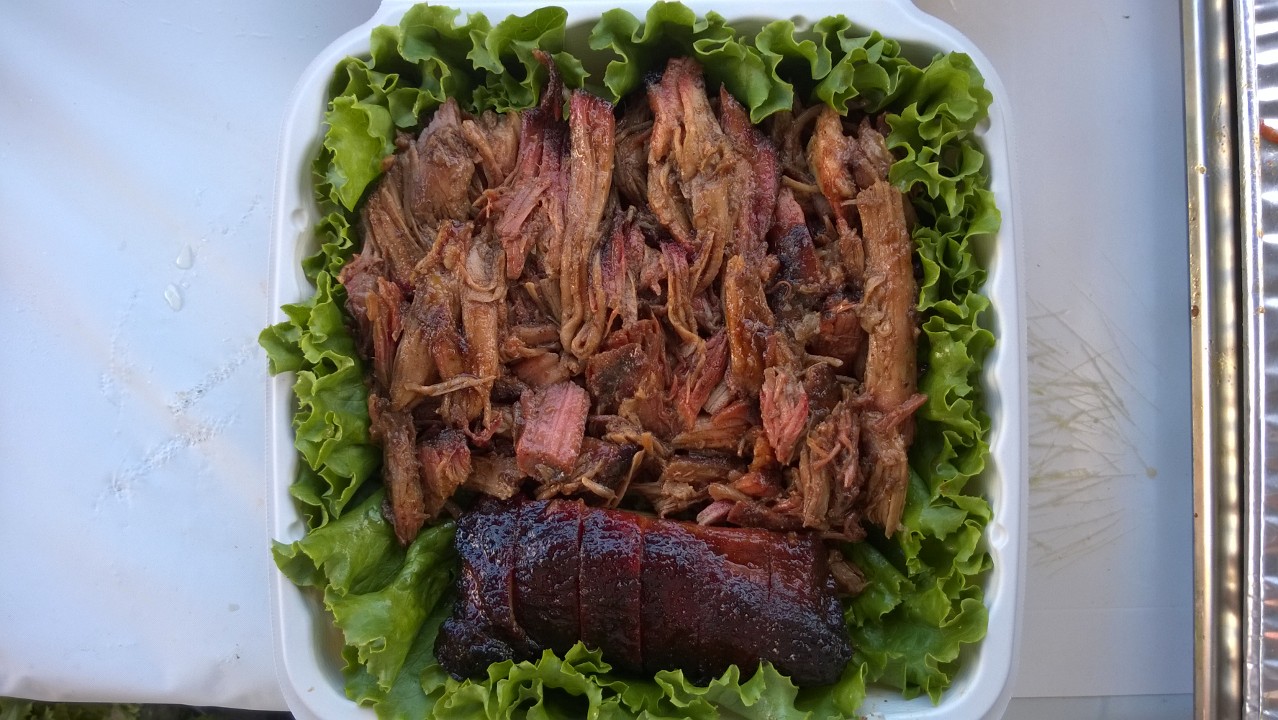
6th Place Pork
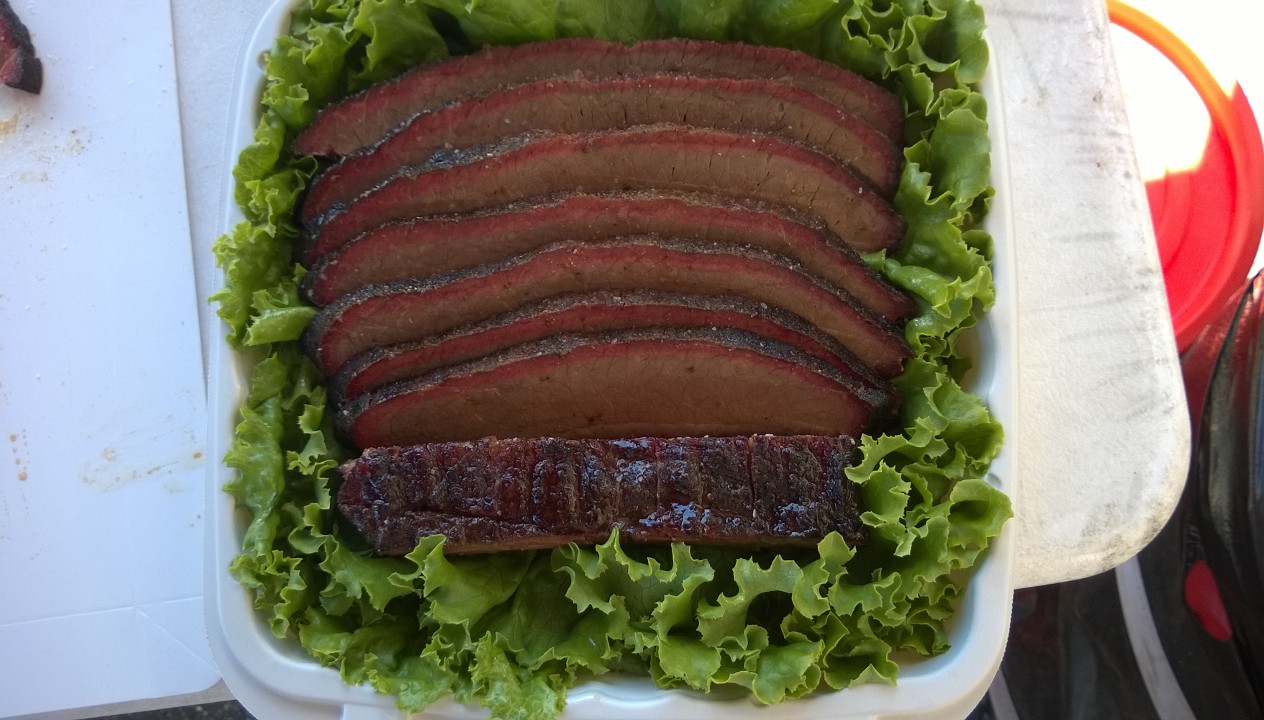
5th Place Brisket

5th Place Chicken

2nd Place Ribs
There was a 10 to 15 minute break between Chicken results and Rib results, as the PNWBA presented plaques to the initial inductees of the Hall of Fame. While listening to the speeches, I kept thinking “Gotta walk in ribs, gotta walk in ribs.” We walked in ribs.
With several different teams placing well, I knew it would be close, but I figured we had to be at least in the Top Three. We were close – we pulled out Reserve Grand Champion (second overall).
All-in-all, the weather was perfect, the event was fun, and we’ll definitely be back next year!


 To Help")